I found an old WD My Passport external hard drive that sat unused for years, and now I’m having trouble accessing the files on it. It has important photos and documents I really need to recover, but the drive isn’t showing up consistently and I’m worried using it more could make things worse. Looking for safe WD My Passport data recovery advice and troubleshooting steps.
I’ve dealt with a bunch of WD My Passport drives, and “my files disappeared” has not meant total loss most of the time. More often, I found a messed up file system, a broken partition table, or plain old accidental deletion. The disk itself was still fine.
First thing I’d do is check whether Windows still sees the drive.
Open Disk Management and find the WD My Passport in the list. I would ignore the drive letter for now. What matters is simpler. Does Windows detect the device, and does the listed size look close to what the drive should be?
If the capacity looks right, I usually take that as a decent sign. Even when Windows shows RAW, Unallocated, or throws up a format prompt, I’ve still had decent recovery results because the hardware was responding. Different story if the drive never shows up, drops in and out, or starts making odd clicking or grinding sounds. At that point I’d suspect hardware trouble first.
Once the drive appears, stop writing anything to it. I learned this the hard way once with a photo archive. Deleted files and broken partitions are often still recoverable until new data lands on top of the old blocks. If you keep using the drive, your odds get worse fast.
Before you run recovery software, check whether the files already exist somewhere else. I’ve seen people spend half a day scanning a drive, then realize their folders were sitting in OneDrive, Google Drive, or Dropbox the whole time. Worth checking before you burn time.
If there’s no backup, I’d go straight to recovery software.
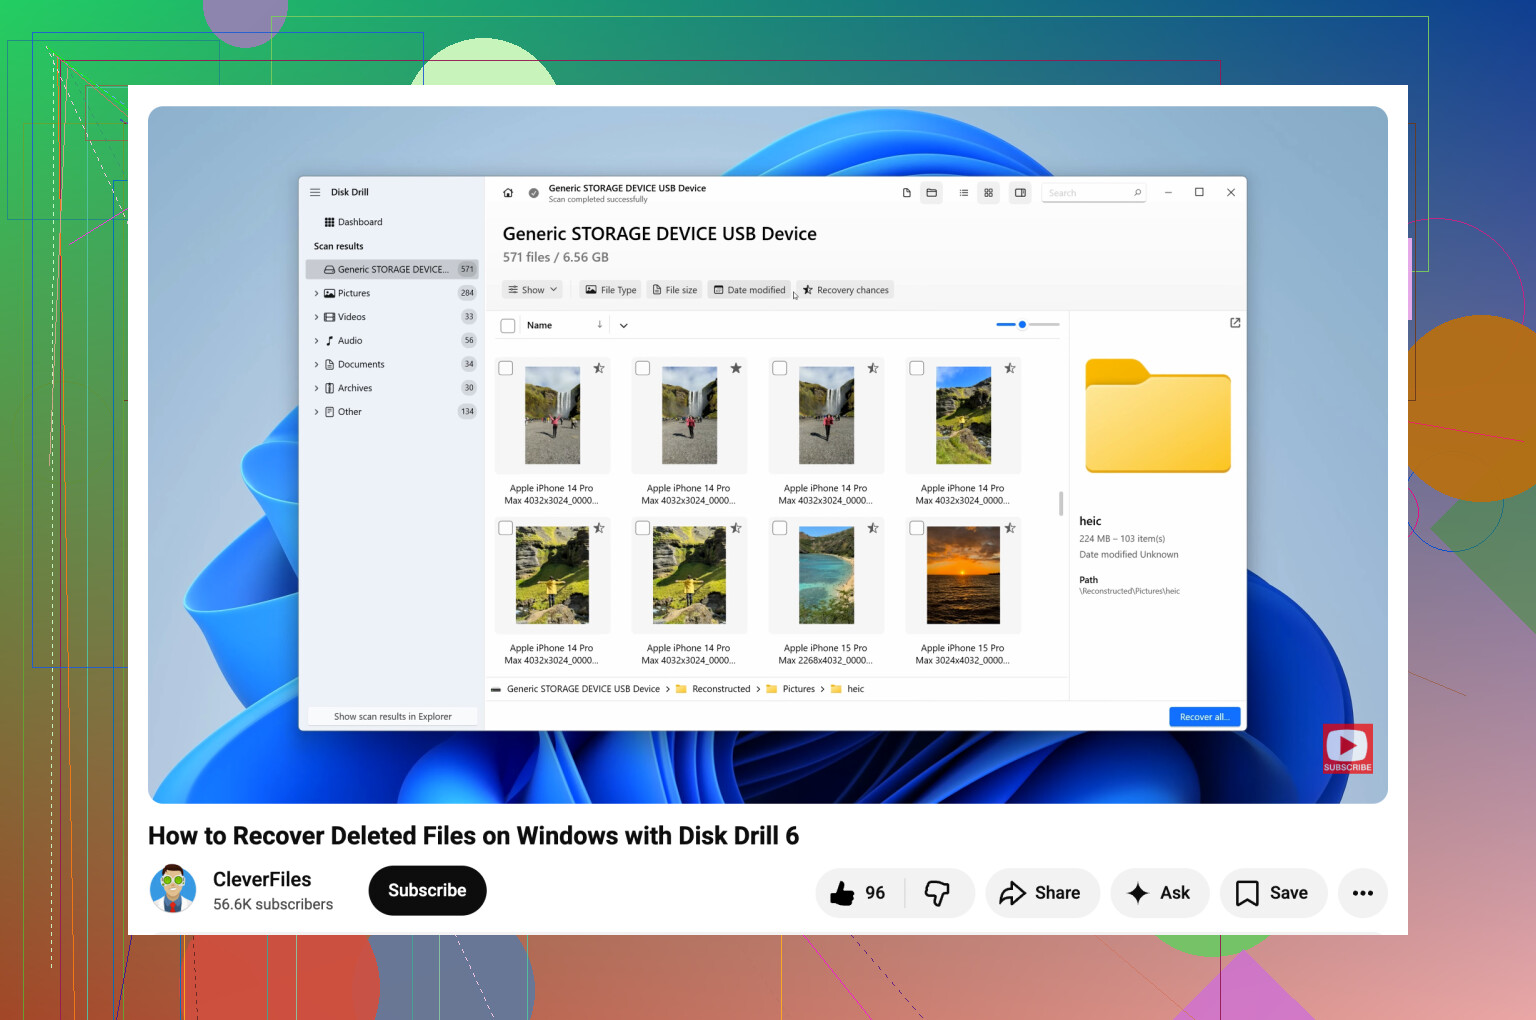
For WD My Passport drives, https://www.disk-drill.com/ is one of the tools I’ve had decent luck with. It handles deleted files, formatted partitions, and RAW volumes without much fuss. It also works with NTFS and exFAT, which is what I usually see on these drives. The preview option matters too. If a photo or doc opens in preview, I tend to feel a lot better about recovery.
What I usually do:
- Install the software on your PC, never on the WD drive.
- Connect the My Passport and wait for the software to detect it.
- If the drive acts flaky, make a byte-to-byte image first and scan the image instead of the original disk.
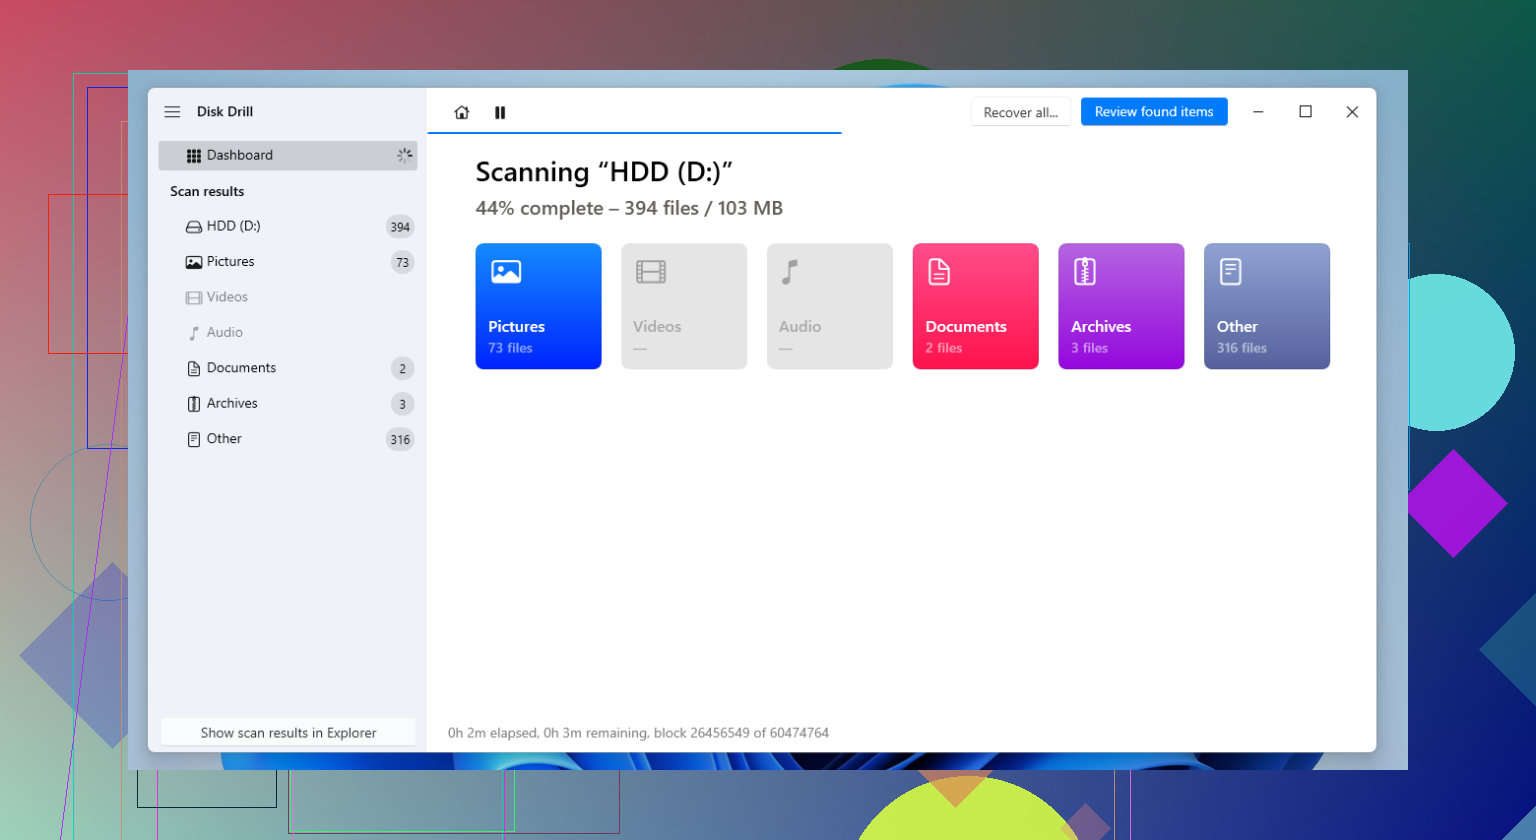
- Run a full scan.
- Go through the results and preview the files you care about.
- Recover everything to a different drive.
Small thing, but important. Do not recover files back onto the same My Passport. I’ve seen people do this and make the mess worse.
After you get your files back, set up backups before using the drive like normal again. External drives are fine for storage, but I would not trust one as the only copy of anything important. File History, Acronis, cloud sync, whatever fits your setup. One extra copy saves a lot of pain later.
1 Like
If the WD My Passport spins up and shows a light, I’d start with the simple stuff first. Old My Passport drives often fail from the USB bridge or cable, not the platters. Try a different USB cable, a different port, and if possible a different PC. I’ve seen dead-looking drives come back from a $8 cable swap. Stupid, but real.
I agree with @mikeappsreviewer on not writing anything to the drive. I’d also add this, do not run CHKDSK yet. A lot of people do it first. Bad move on a drive with important files. CHKDSK fixes structure by deleting broken entries, which is the oposite of recovery.
If Windows does not mount it, check Device Manager. If it appears there but not in File Explorer, the enclosure board might be flaky while the disk still reads. WD My Passport units sometimes use onboard USB, which makes DIY work more annoying than older SATA externals.
If the drive is readable at all, image it first with a sector-by-sector copy. Then scan the image with Disk Drill or another recovery app. Disk Drill is solid for old photo and document recovery, and I like using it after imaging, not before. Less risk, less stress.
If the drive clicks, disappears, or freezes your system, stop. That’s lab territory.
Also, if you want a cleaner walkthrough, this Windows hard drive recovery guide for old external drives is worth a look. It’s short and to the point.
Biggest thing, treat the drive like fragile evidence, not storage. One wrong “repair” step and stuff gets worse fast.
If the WD drive is totally invisible in File Explorer, I’d check one thing the others didn’t really get into: whether it’s being blocked by encryption or WD software weirdness. Some older My Passport models used WD Security / SmartWare stuff, and after years of sitting around, the unlock software can be the actual roadblock, not the disk itself. If you ever set a password on it, that matters a lot.
Also, slight disagreement with @mikeappsreviewer and @mike34 on one point: imaging first is ideal, but for non-tech users it’s not always the fastest path if the drive is stable and readable enough for a scan. People get stuck trying to build the perfect forensic workflow and never actually recover anything. If it shows up consistently and isn’t making ugly noises, I’d at least verify what recovery software can see before going too deep down the rabbit hole.
A few extra things to try:
- Look in WD Drive Unlock or WD Discovery if you used WD’s tools before
- Check if the drive shows in Diskpart with
list disk - On another machine, see if it mounts differently
- If it asks to initialize the disk, don’t click yes. Seriously, dont.
If the partition is gone or the file system is toast, Disk Drill is still a solid option because it can find files by signature even when the folder structure is half-dead. I’d mostly use it for photos/docs previews first, then decide if the drive is stable enough for a full pull. If you want a more readable overview, this Disk Drill recovery review and usage guide breaks down what it does pretty clearly.
One more thing people miss: if it’s an old powered-down drive, let it stay connected for 10 to 15 mins. I’ve had ancient externals appear super late after spin-up. Annoying, but real. If it starts clicking, hanging Explorer, or disconnecting, stop messing with it. That’s where DIY turns into “welp, should’ve stopped sooner.”
One angle I’d add to what @mike34, @voyageurdubois, and @mikeappsreviewer said: check whether the problem is actually power-related, not just data-related. Some older My Passport units get weird on low-power USB ports, especially front-panel ports, hubs, docks, or laptops in battery-saving mode. I’ve had drives that were “dead” until plugged directly into a rear motherboard port.
Also, don’t overlook Linux for triage. I slightly disagree with the “stay entirely in Windows first” approach if Explorer keeps hanging. A Linux live USB can sometimes see a marginal external drive more cleanly and let you copy data without Windows trying to be “helpful.” If the partition mounts read-only there, that’s often the safest lucky break you’ll get.
A practical check list I use:
- Feel the drive after 2 to 3 minutes. Warm with vibration is different from cold and silent.
- Listen for a steady spin versus repeated spin-up/spin-down.
- See if SMART data is readable with a utility. If SMART won’t read at all, that’s a bad sign.
- If Windows freezes when the drive is attached, unplug it and stop testing repeatedly.
On software, Disk Drill is fine for recovery once the drive is at least somewhat readable.
Pros:
- easy previews for photos and docs
- good at finding files from damaged file systems
- interface is less painful than a lot of recovery tools
Cons:
- deep scans can take forever on sick drives
- results can be messy with lots of renamed files
- not magic if the hardware is failing
If Disk Drill can preview your important files, that’s usually the signal to recover them immediately to another disk. If it cannot even complete a scan without disconnects, stop burning the drive’s remaining life and consider a lab. That’s the point where more DIY usually means fewer recoverable files later.